Scenario:
Let’s create a Virtual Kubernetes cluster with MySQL installed in it in just 80 Seconds with Klusternetes(KNTS)
Introduction :
MySQL is an open-source relational database management system. As with other relational databases, MySQL stores data in tables made up of rows and columns. Users can define, manipulate, control, and query data using Structured Query Language, more commonly known as SQL.
Klusternetes is a platform that allows you to create a Kubernetes cluster in a few seconds. It also provides some of the leading DevOps tools as add-ons while creating your Cluster and provides a Service URL for add-ons that have UI.
Steps:
Login to the klusternetes App. If you don’t have an account in the Klusternetes app check here to create one
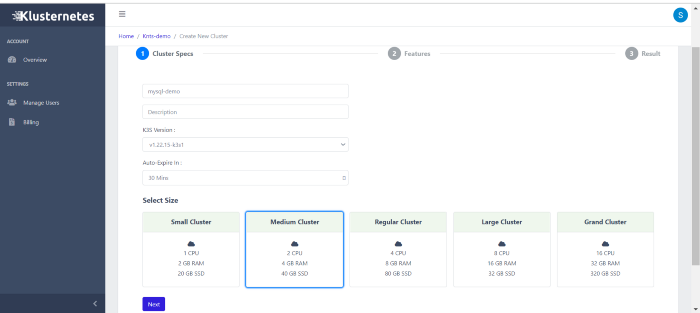
Click on “Add cluster” in the top right corner which will lead you to a cluster creation page. Fill in the necessary fields and select a medium cluster and click next.
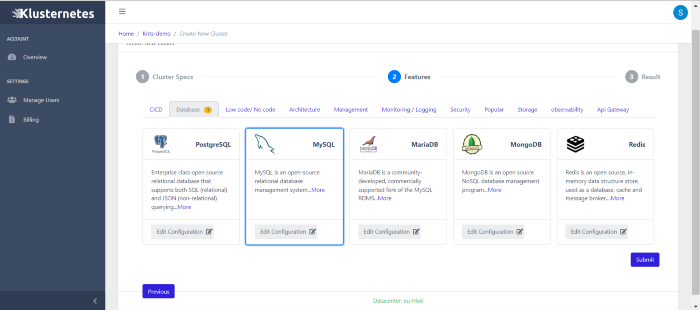
It will lead you to the Features page, go to the Database section, and select MySQL. Here comes the best feature of Klusternetes, we can edit the configuration of the add-ons. So, now click on “Edit configuration”
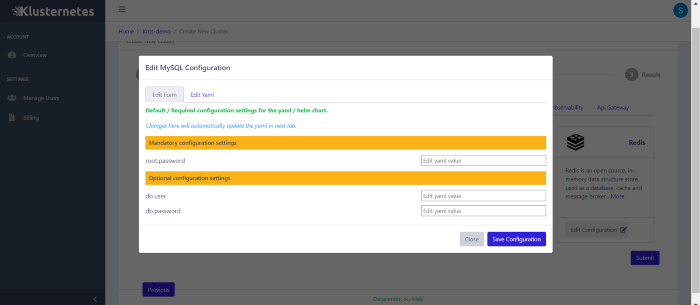
Here you can change the password of the MySQL application or if you want to edit more configurations you can click on Edit YAML at the top and can edit the field which you want.
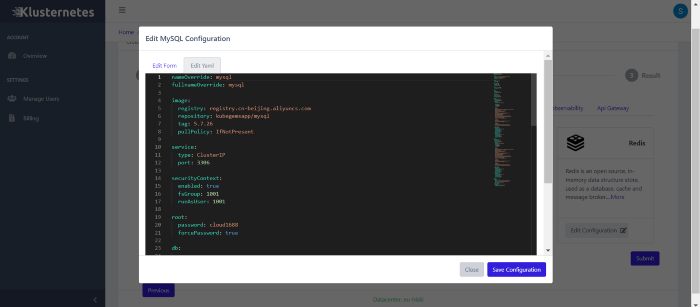
After editing the config as you want click on the “Save configuration” button and then click on the “Submit” Button.
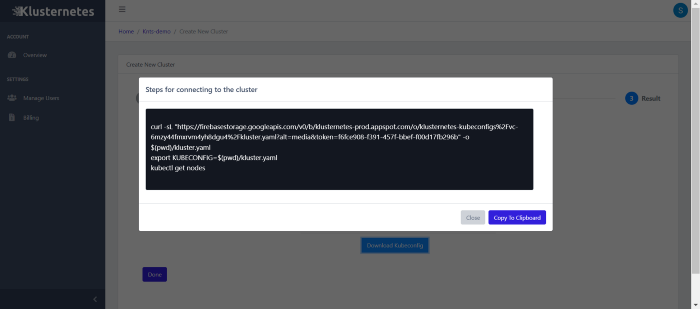
That’s it, you created a Klusternetes cluster with MySQL installed in it. Now you can download the kubeconfig of the cluster by clicking on the download button. It will show you the command’s to download.
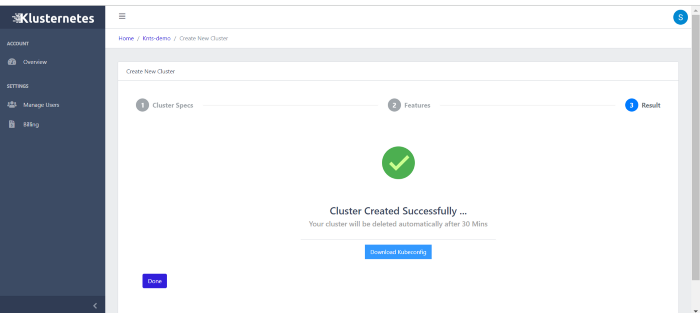
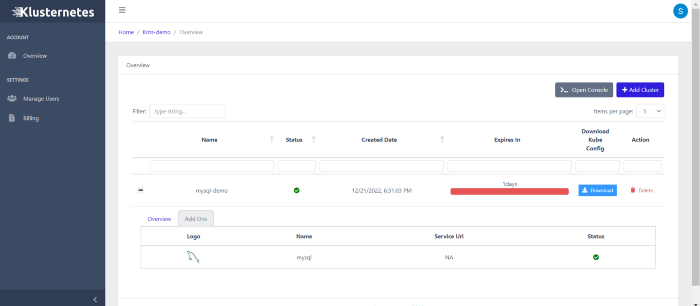
You can get the download option even on your cluster list page. Click on “Done”. Now you will be on the main page of your account. Here is the list of clusters that you created and information about your cluster.

Click on the “+” icon near your cluster, you can see two columns one is for an overview of the cluster and the other is for Add-on.

Activate the cluster with those 3 commands from the download button.
Now check if your pods are up with this command
kubectl get pods
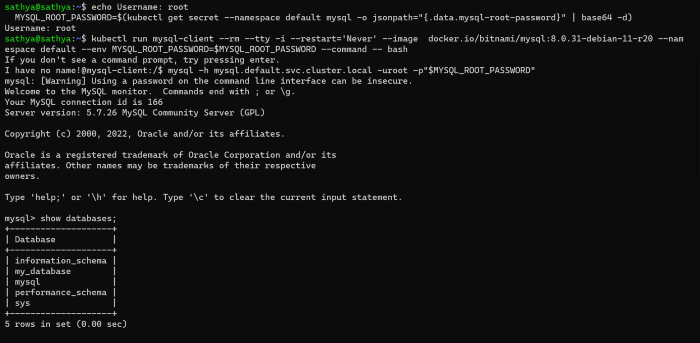
After your pods are up and running export your password and run a client for your MySQL by running these commands.
export MYSQL_ROOT_PASSWORD=$(kubectl get secret mysql -o jsonpath="{.data.mysql-root-password}" | base64 -d)

kubectl run mysql-client --rm --tty -i --restart='Never' --image  docker.io/bitnami/mysql:8.0.31-debian-11-r20 --env
MYSQL_ROOT_PASSWORD=$MYSQL_ROOT_PASSWORD --command
 -- bash
Now you will be inside your client. Now you need to log in to your primary account with this command
mysql -h mysql.default.svc.cluster.local -uroot -p"$MYSQL_ROOT_PASSWORD"
Now you can run all the commands that you can run of MySQL like show databases; and show tables; etc.
Summary:
So, that’s how you can spin up the MySQL cluster within 80 seconds. Klusternetes also provide a lot of add-ons and is easy to understand.